Daily Work
Workspace Archibot and Shared Drive
Manage Shared Drive in Console across its five tabs - browse and edit files, create folders, upload evidence, grant scoped Archibot access, request staged restores, and create customer drives.
Last updated
Shared Drive is persistent account storage that Archibot can use across Chat, VS Code, API sessions, workspaces, review, and QA. You manage it from Console at the Shared Drive route, not from inside a workspace editor. Personal drives stay scoped to you; customer drives are created and managed by account admins.
This guide covers the Console surface end to end: the five tabs, file and folder management, uploads, scoped Archibot access grants, backups and staged restore, and creating a customer drive.
Open Shared Drive
- Sign in to Console and open Shared Drive from the left navigation.
- The header shows two posture badges - Shared storage and Expandable personal store - and, for admins, quick status chips for NFS service, Backups, and Agent grants.
- Use Refresh in the header any time to reload drives, files, and backup status.
Below the header is a row of tabs. The count next to each tab reflects what is loaded for your account:
| Tab | What it is for |
|---|---|
| Shared Drive | Drive cards with quota, usage, storage class, and connected surfaces |
| Recent files | Browse, edit, organize, and upload files in a selected drive |
| Archibot access | Create scoped task grants so Archibot can read approved files |
| Backups and restore | Check backup status and request an audited staged restore |
| Workspace capture | See what workspace-generated material can be copied into the drive |
What you can change depends on your role. Members can read and write their own personal drive. Customer drive write actions, the create-customer-drive form, and operator-wide controls appear only for customer admins and platform operators.
Review your drives
The Shared Drive tab lists your drives grouped by scope. Each card shows the drive name, owner, a Personal or Customer badge, and an Available or Pending status badge.
Each drive card includes:
- Quota, Used, and Storage metrics.
- Connected surfaces badges showing where the drive is reachable (Chat, VS Code, API sessions, workspaces, review, QA).
- Open drive to jump straight into the Recent files view for that drive.
- Request expansion to open the Catalog with storage in focus.
Good Shared Drive content is sanitized and durable: short session notes and handoff summaries, reproduction steps, customer-approved screenshots or text evidence, and draft deliverables you want available from other surfaces and future workspaces.
Do not store passwords, API keys, cookies, raw credential payloads, private transcripts, customer data dumps, or license files in Shared Drive.
Browse and manage files
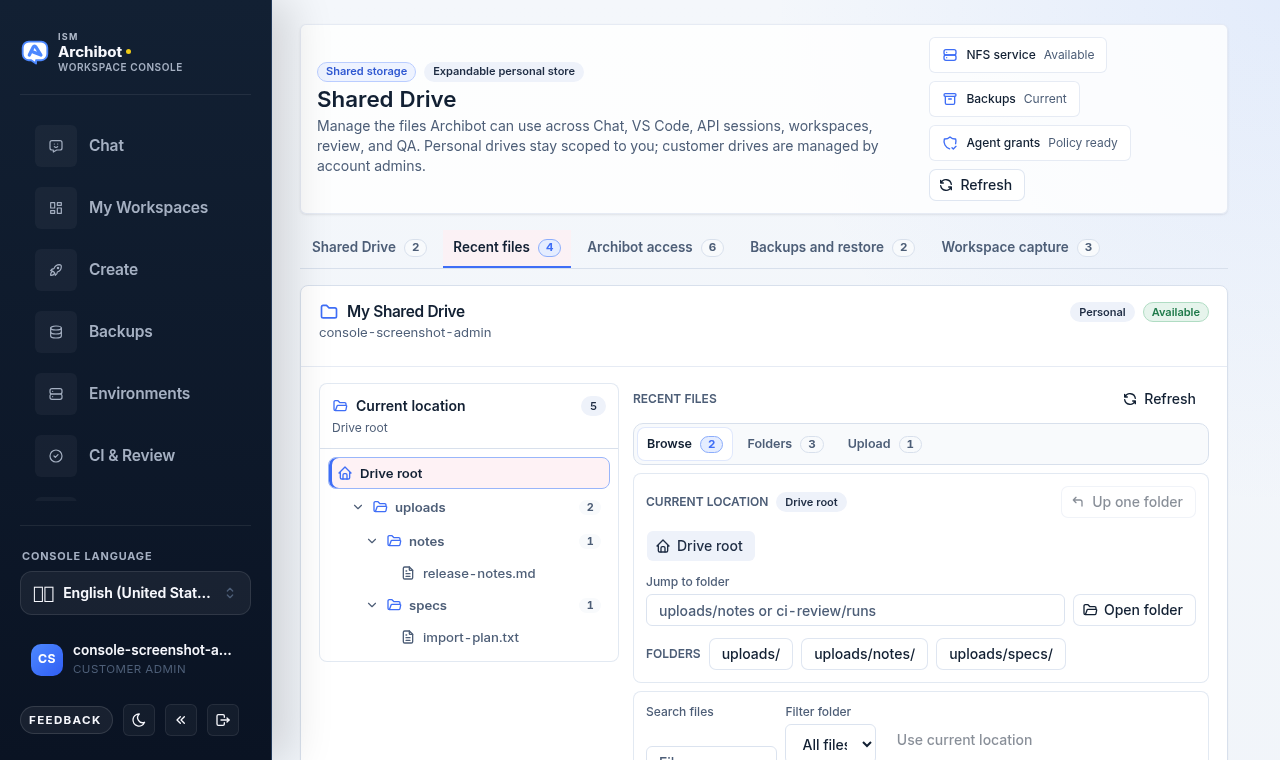
Select Recent files, or click Open drive on a card, to open the file workbench for a single drive.
The workbench has two areas:
- A Current location folder tree on the left. Click a folder to scope the file list to it; the breadcrumb above the file list shows where you are.
- A file pane on the right with three sub-tabs: Browse, Folders, and Upload.
On the Browse sub-tab you can:
- Use the folder shortcut pills (for example
uploads/,uploads/notes/) to jump between common locations. - Filter with Search files and Filter folder, then run the search or Clear it.
- For each file, use Download to save it locally.
- With write access, use Rename to change the file name or move it to another folder, then Save.
- With write access, use Remove to delete a file. The button asks for a second click to confirm before it deletes.
Long lists are windowed. A notice tells you how many files are shown versus loaded; narrow the path prefix or search to find a specific file rather than scrolling.
Create and organize folders
Switch to the Folders sub-tab to structure a drive:
- Enter a folder path such as
archibot/sessions/, or use the active-folder shortcut to seed the field from your current location. - Create the folder. The new path becomes the active location.
- Existing folders can be renamed (which moves their contents) or removed, both gated by write access and a confirm step.
Suggested folders to keep work organized:
archibot/sessions/for short session summaries and recovery notes.ci-review/evidence/for sanitized review or QA evidence.workspace-backups/for small user-generated artifacts that should outlive a workspace.
Upload an evidence file
Use the Upload sub-tab to add sanitized notes, reports, or text artifacts so Archibot and your teammates can reference them later.
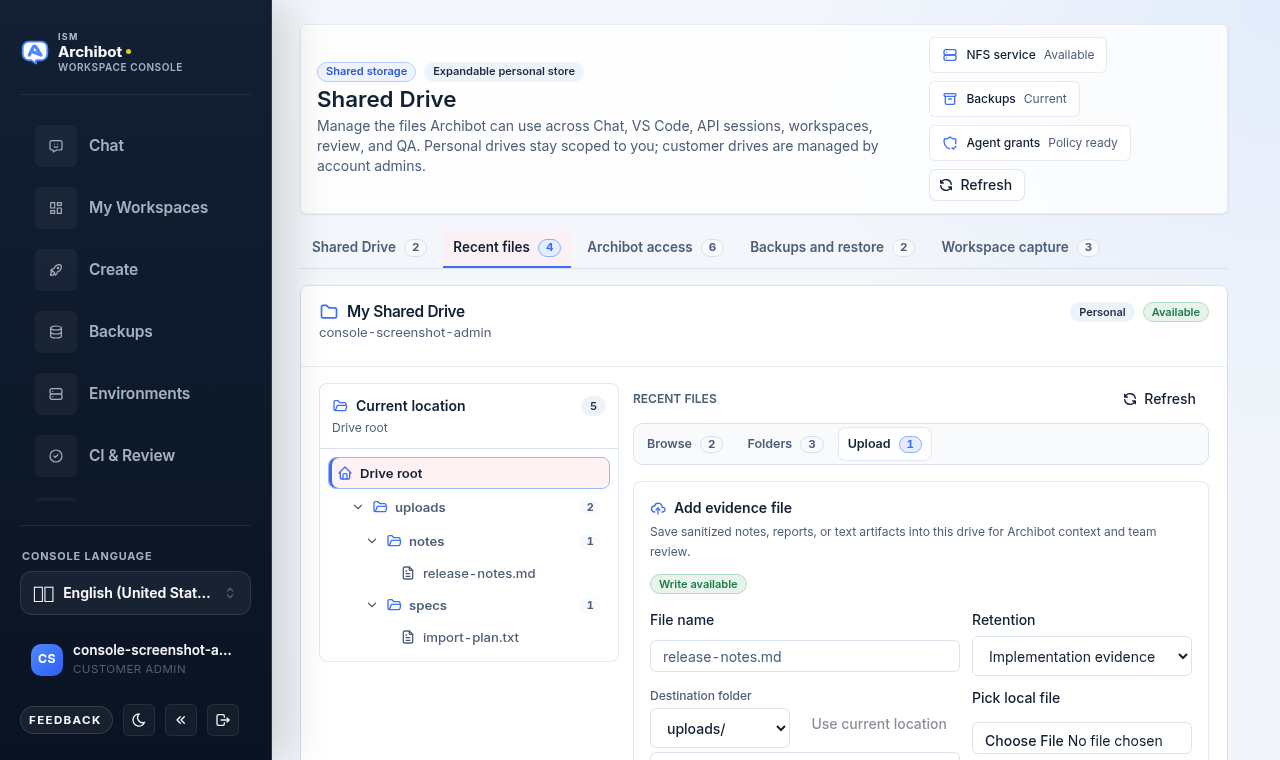
- Set the File name (for example
release-notes.md). - Choose a Destination folder, or select Use current location to upload into the folder you are browsing.
- Pick a Retention class such as Implementation evidence so the file is tagged for its purpose.
- Either type or paste content into the form, or use Pick local file to attach a file from your computer. Small text files are read into the form automatically; larger or binary files are staged for direct upload.
- Save the file.
Local file selection is size limited, so keep uploads to small work artifacts rather than full data dumps. After a successful upload the file appears under Browse in the chosen folder.
Grant scoped Archibot access
The Archibot access tab is where you let Archibot read approved files without exposing the whole drive. Grants are bounded - they do not hand over raw storage paths or bulk file content, and every manifest read is audited.
To create a grant:
- Choose the Surface the grant is for: Chat, API, VS Code, Workspaces, Review, or QA.
- Choose the Access mode - read, or read and write where you have write access.
- Set the Grant folder path prefix, optionally using Use current location.
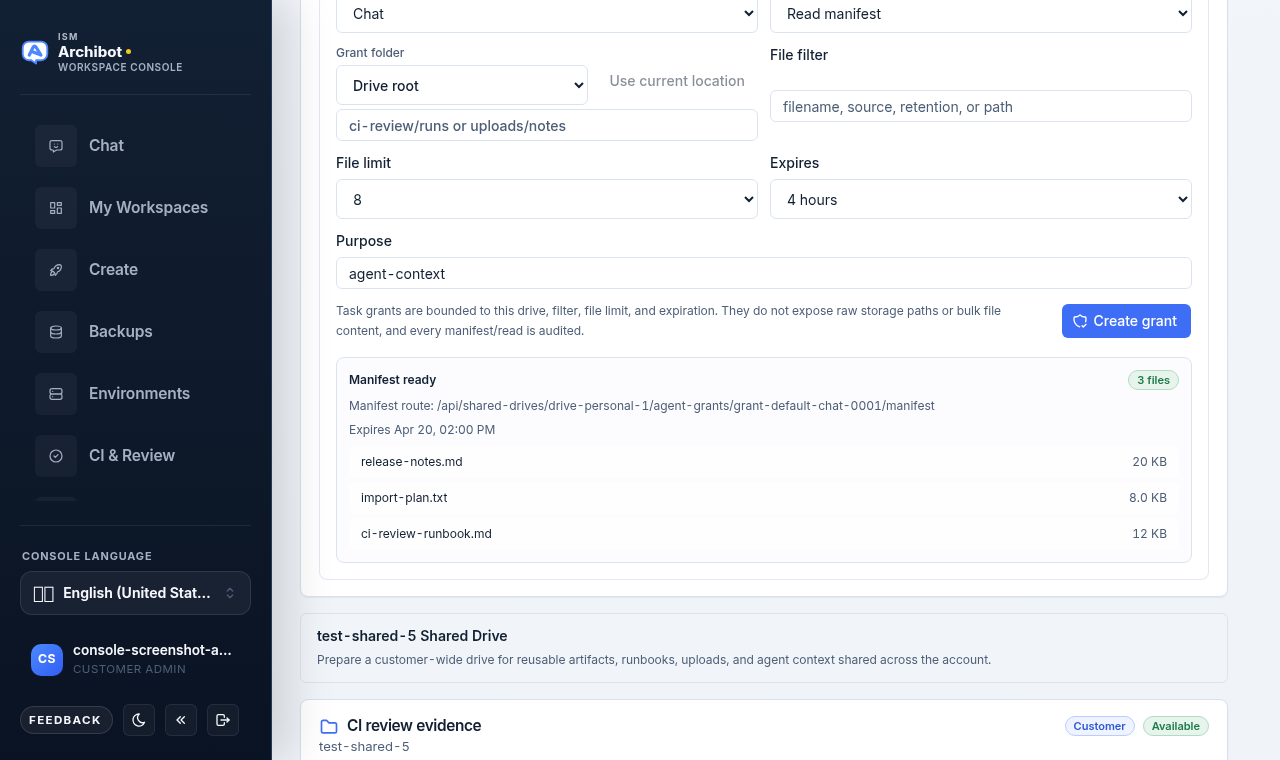
- Optionally add a File filter (filename, source, retention, or path) and a File limit.
- Pick an Expires window: 30 minutes, 4 hours, 24 hours, or 7 days.
- Enter a Purpose such as
agent-context. - Select Create grant.
After the grant is created, a Manifest ready panel shows the file count, the manifest route, the expiry, and a preview of the included files. You can also use Resolve access to fetch the default manifest for the selected surface without creating a new grant.
Treat grants as short-lived, least-privilege access. Scope them to a folder and a short window, and let them expire rather than granting broad, long-lived read access.
Backups and staged restore
The Backups and restore tab shows the latest backup status, size, and object count for the drive, plus an audited restore workflow. Backups copy managed drive data only; raw workspace disks are not part of this snapshot.
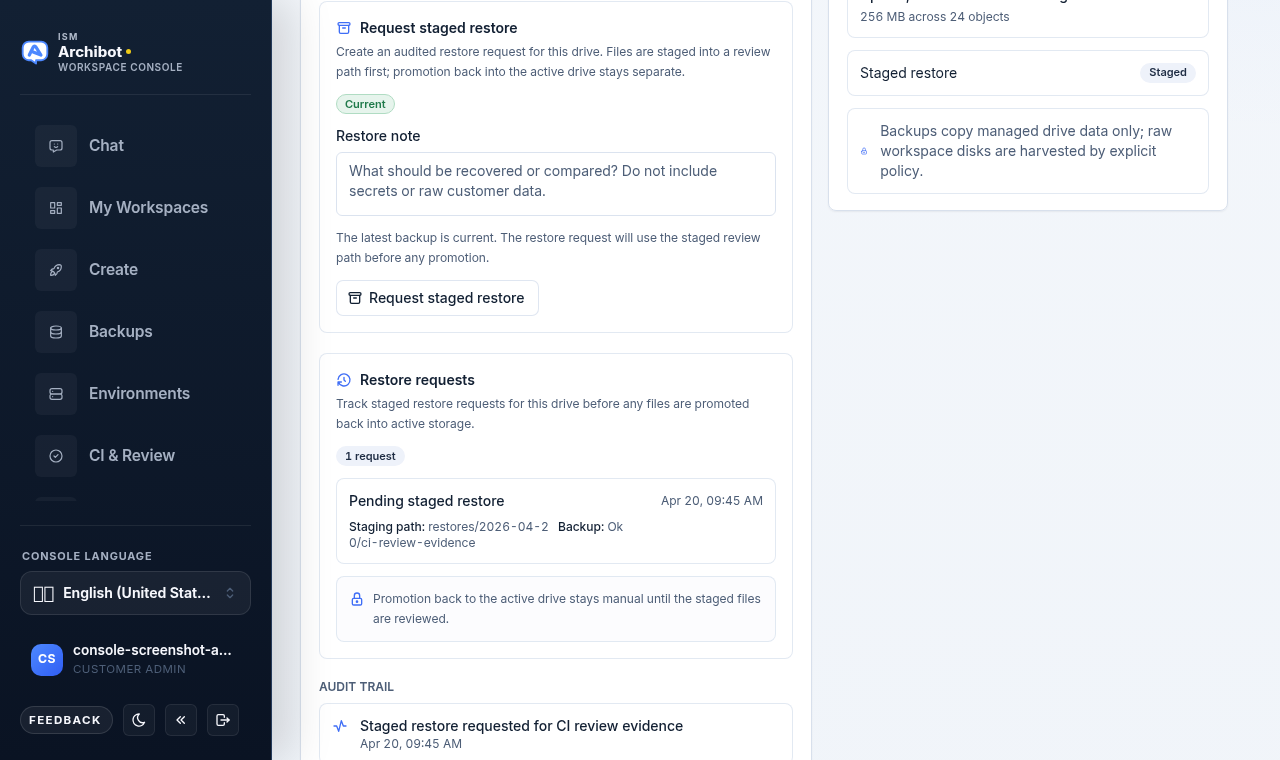
To request a restore (write access required):
- Confirm the backup status badge reads Current or Ok before relying on a restore.
- Add a Restore note describing what should be recovered or compared. Do not include secrets or raw customer data.
- Select Request staged restore.
Restores are staged into a separate review path first - they do not overwrite your active drive. The Restore requests list tracks pending and past requests with their staging path and backup state, and the Audit trail records each request. Promotion of staged files back into the active drive stays manual until the staged files are reviewed.
Workspace capture
The Workspace capture tab describes the workspace-generated material that can be copied into a drive when you or customer policy allows it, such as Archibot sessions, generated artifacts, and workspace notes. It is informational - it sets expectations for what gets captured rather than offering a button to run a capture.
For important work, save a short sanitized summary into a drive folder yourself. That gives future Chat, VS Code, API, and workspace sessions a safer continuity point than relying on local editor history.
Create a customer drive
Customer admins and platform operators see a Customer drive panel on the Shared Drive tab for setting up account-wide storage.
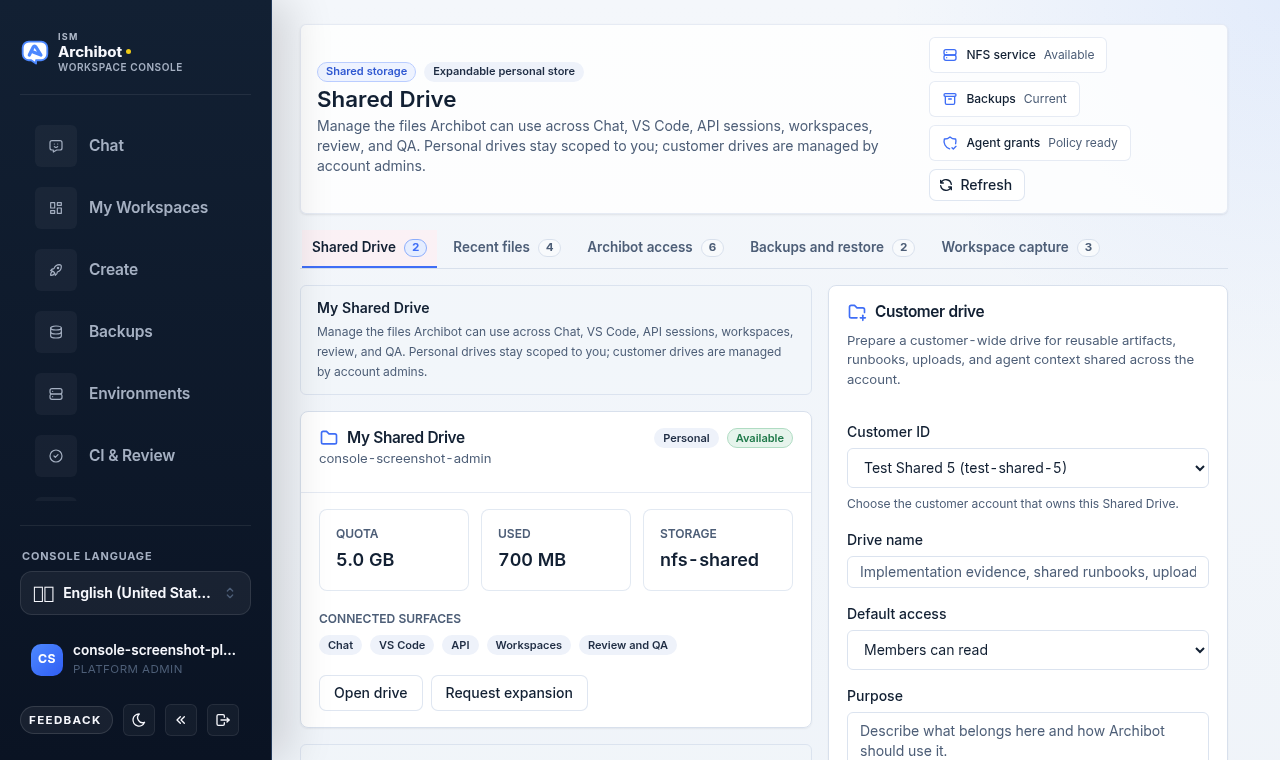
- If you manage more than one customer (or are a platform operator), pick the target Customer ID.
- Enter a Drive name such as
CI review evidence. - Choose a Default access policy: Members can read, Admins can write, or Agents can read approved folders.
- Add a short Purpose describing what the drive is for.
- Select Create customer drive.
The new drive appears in the list under the customer scope and becomes available to the account according to the default access you set. Customer drives are shared across the account; manage their grants and folders the same way you manage a personal drive, subject to your write access.
Where to go next
- New to the platform surfaces? Start with Welcome to Archibot and Access roles.
- Working inside a running workspace? See Manage workspaces and Create the first workspace.
- For account-level backup sources and how Shared Drive snapshots fit in, see Backups and restore sources.
- If a file, grant, or restore action fails, follow Troubleshooting and, if needed, open a Support handoff with the drive name, the action, and the time.
Done When
- You are signed in to Console and can open Shared Drive.
- A personal drive is provisioned for your account.
- Customer drive controls appear only for customer admins and platform operators.
- Staged restore is available when a recent backup is present.